Complete Guide to Onboarding with ZKP2P
How to buy USDC and cryptocurrency on ZKP2P using Revolut, Venmo, Cash App, Wise, and other payment methods. Buy directly from peer liquidity providers with low fees and quick verification.
Step 1: Navigate to ZKP2P
Visit https://peer.xyz in your browser.
Step 2: Connect Your Wallet
You'll need to connect a wallet like Rabby, MetaMask, or sign in with Twitter, Google, or Email. If you sign in using socials, you do not need to pay any network fees.
- Click the wallet icon in the top-right corner
- Select your chosen wallet
- Approve the connection request
Step 3: Select the Buy Tab
Click on the Buy tab in the main navigation bar.
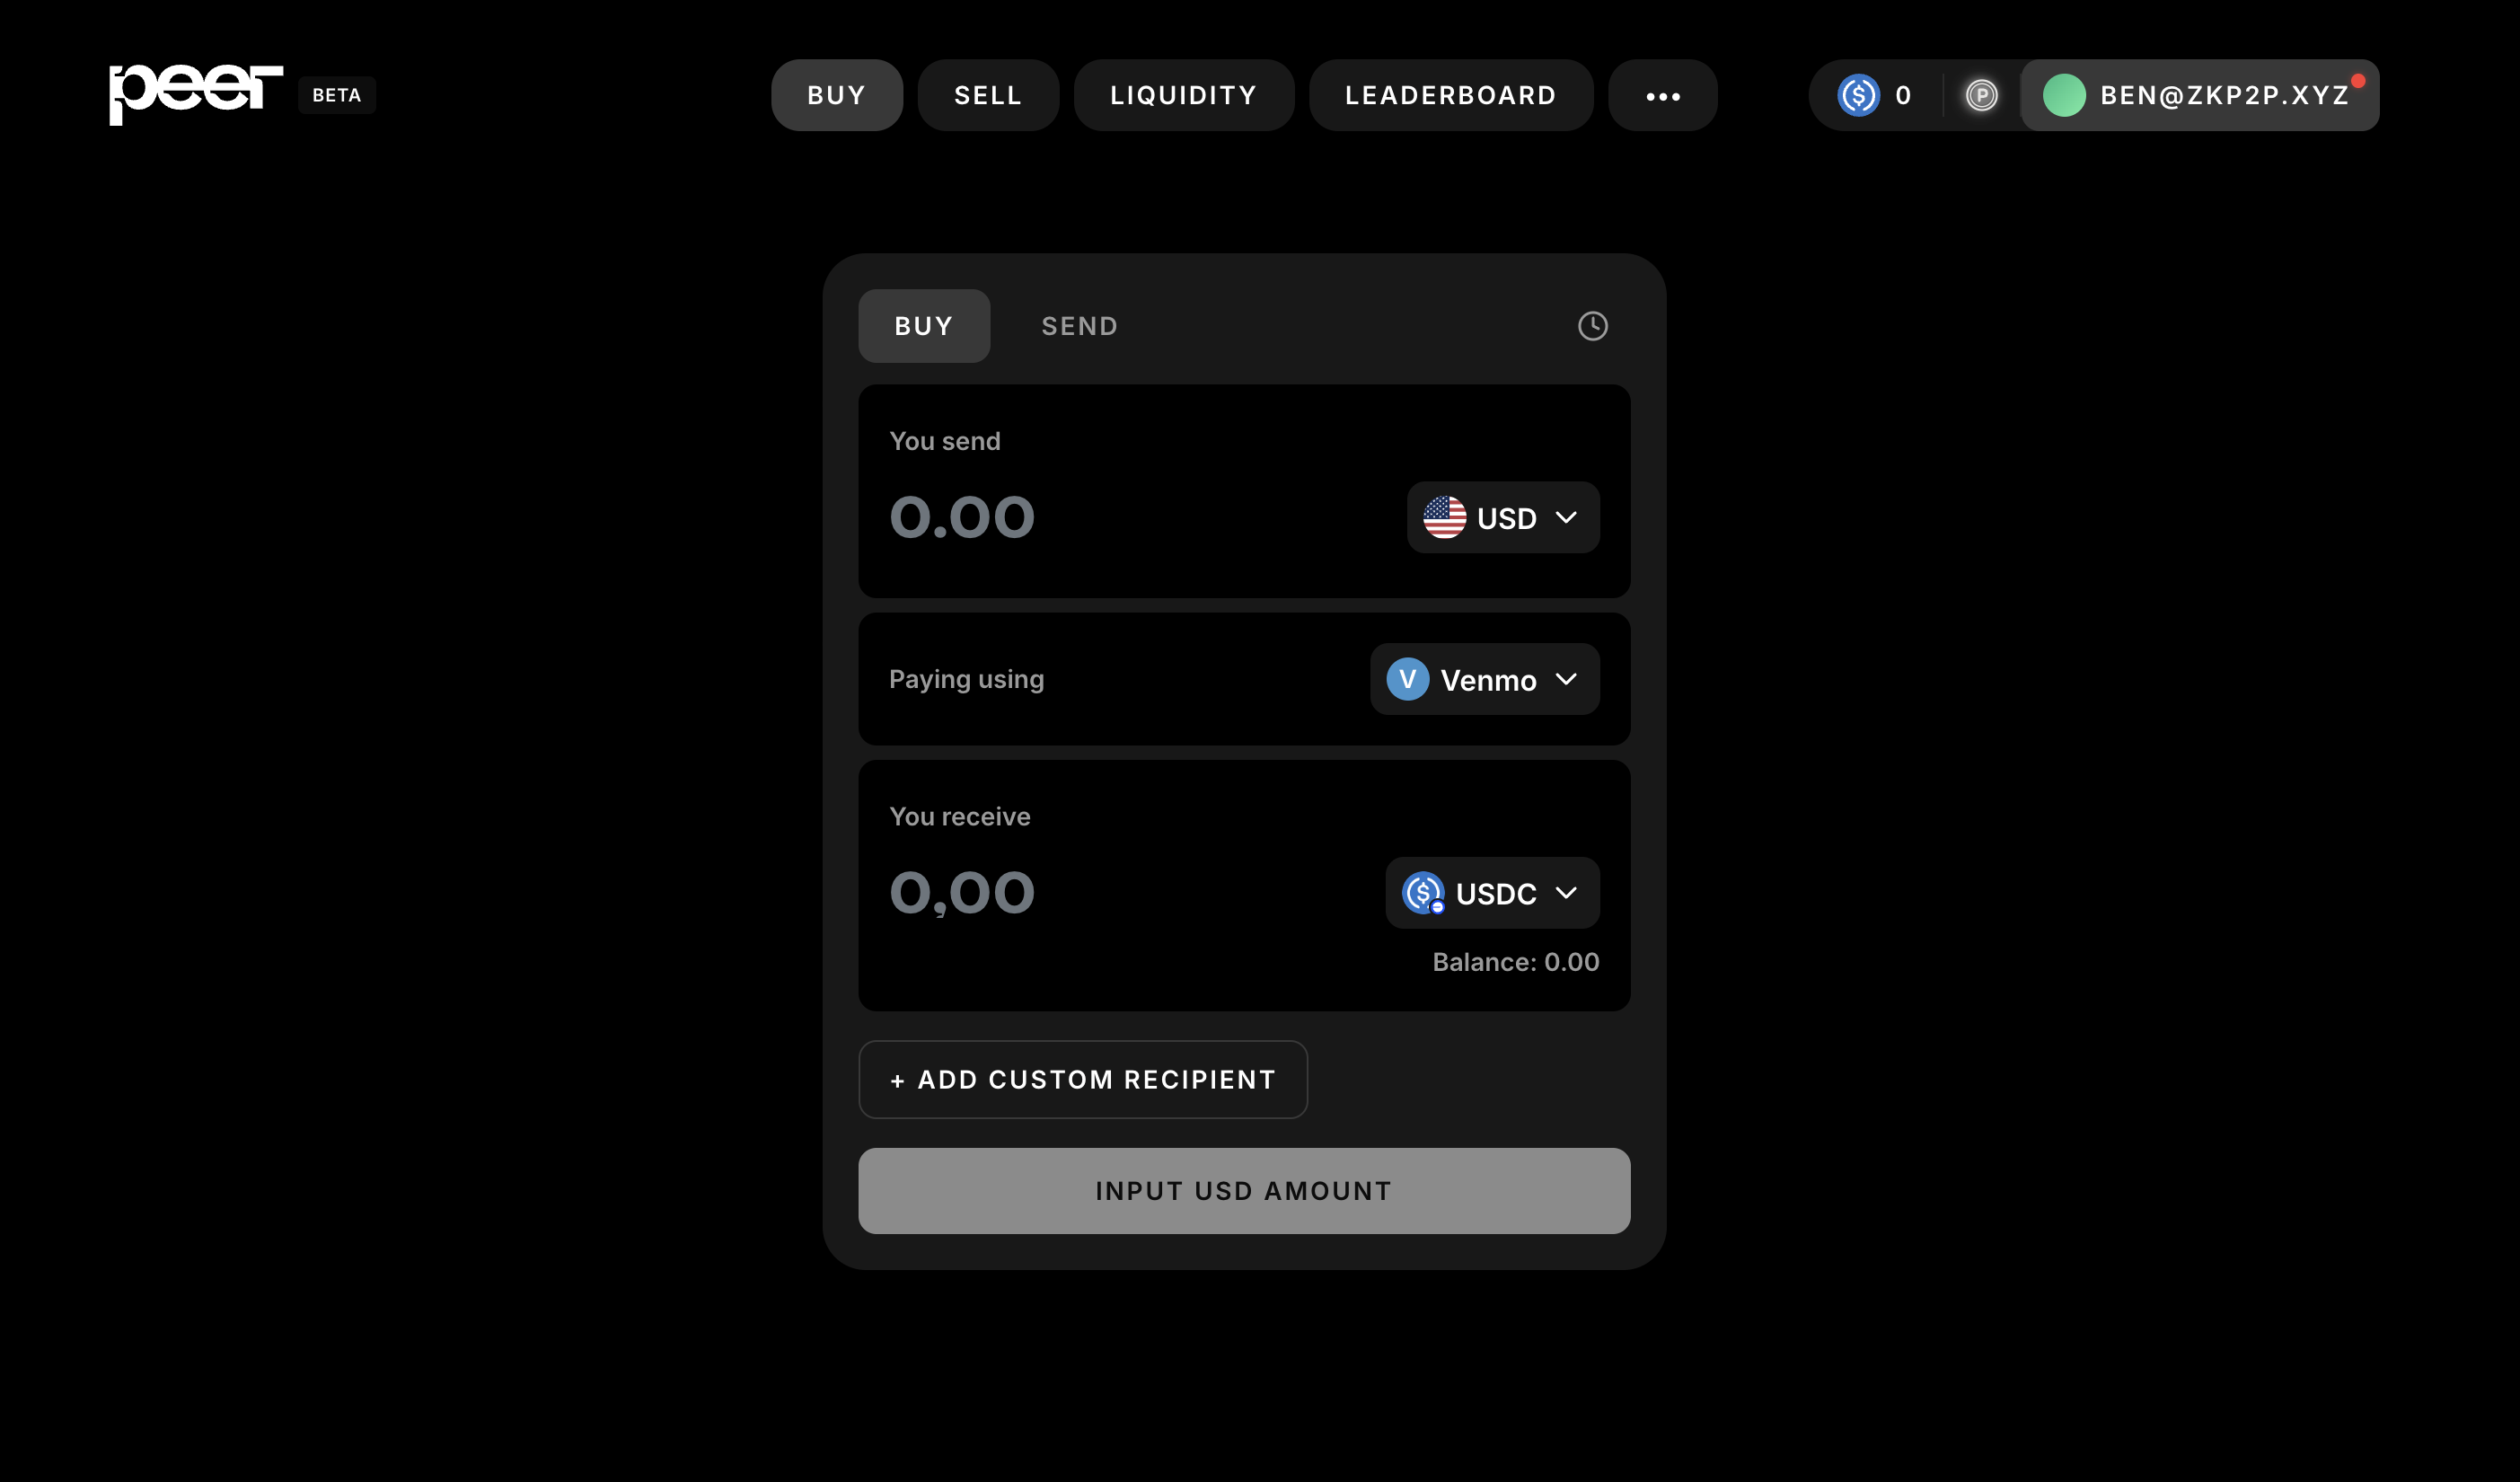
Step 4: Configure Your Purchase
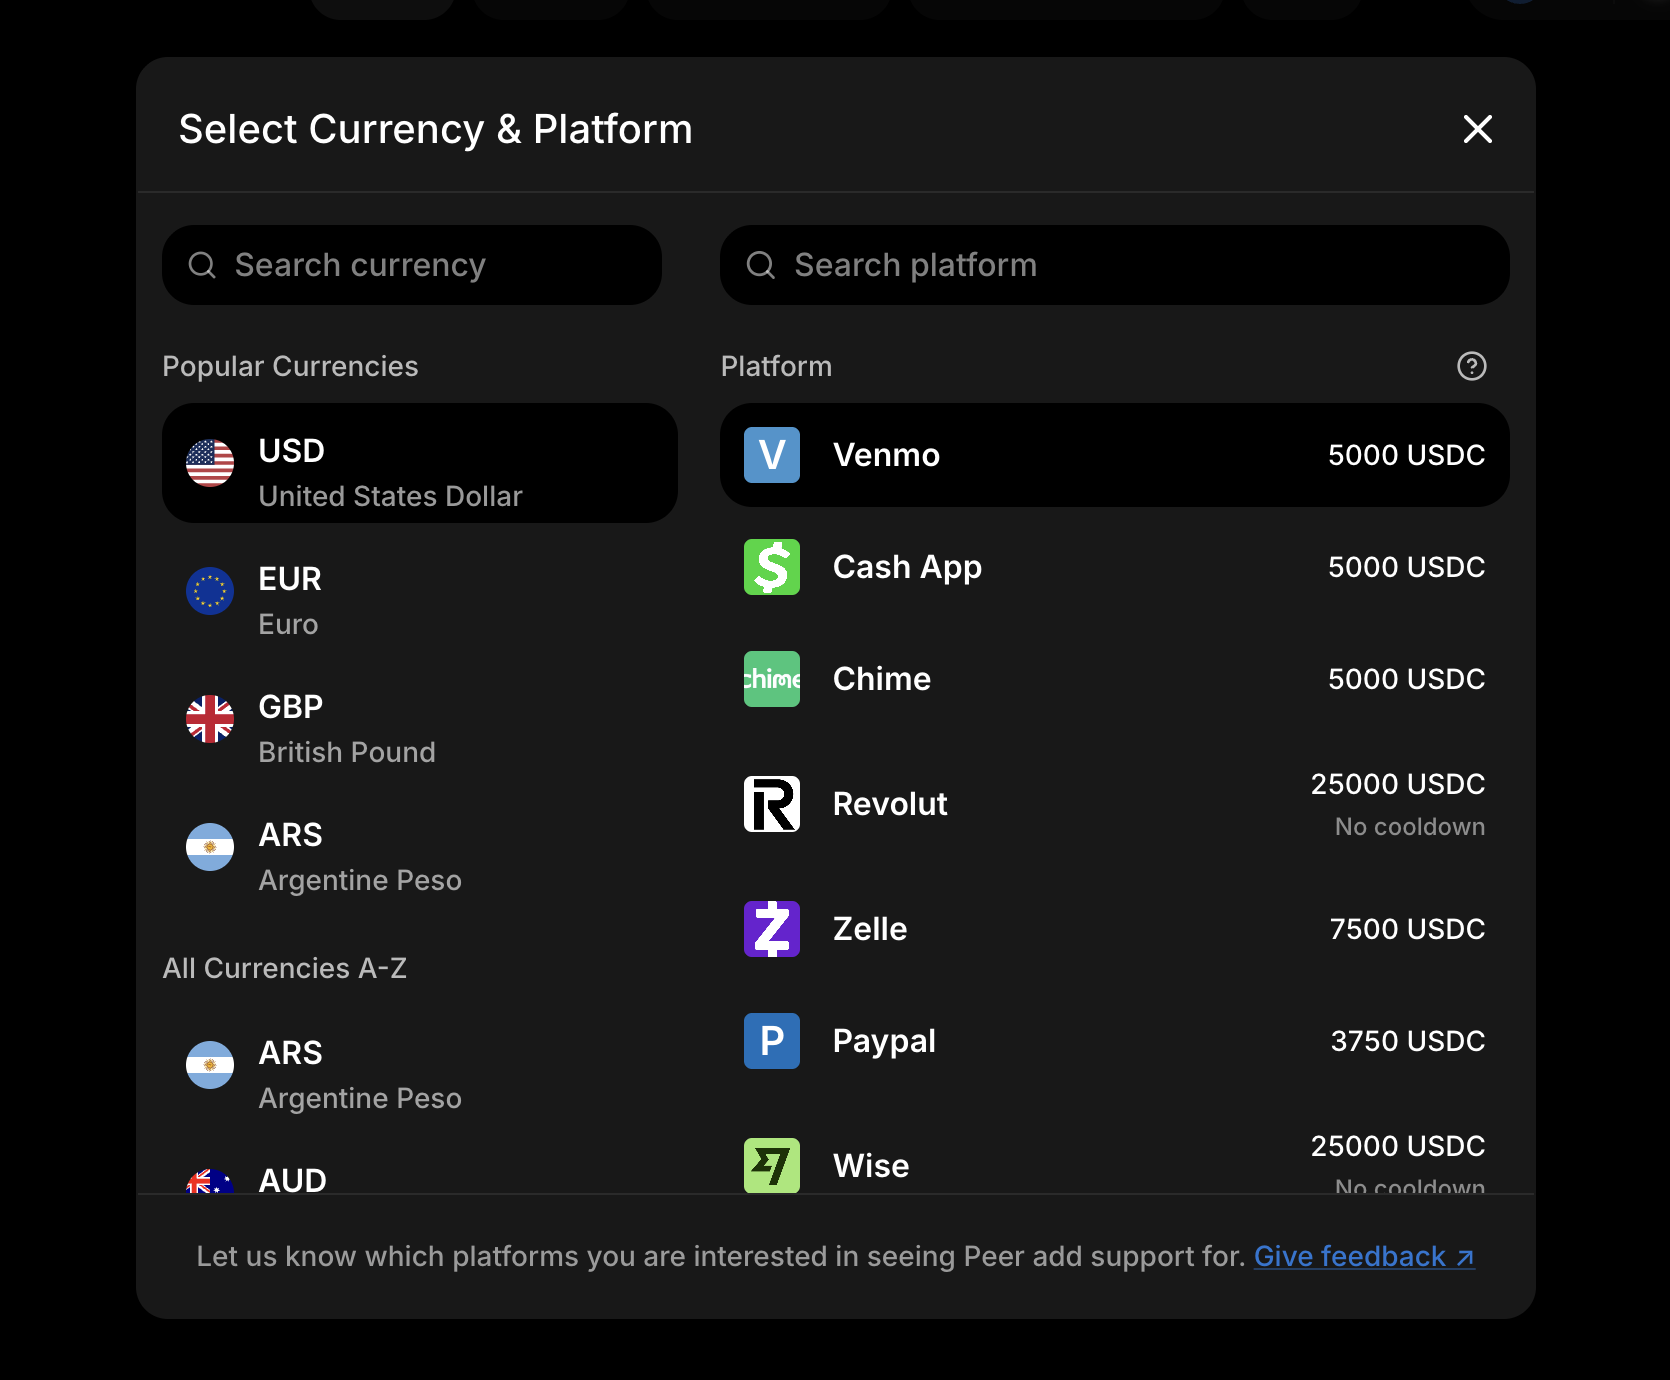
- Select your currency from the dropdown menu (USD, EUR, GBP, etc.)
- Enter the amount you want to send in your local currency (e.g., 1 USD)
- Choose your payment method (Revolut, Venmo, Cash App, Wise)
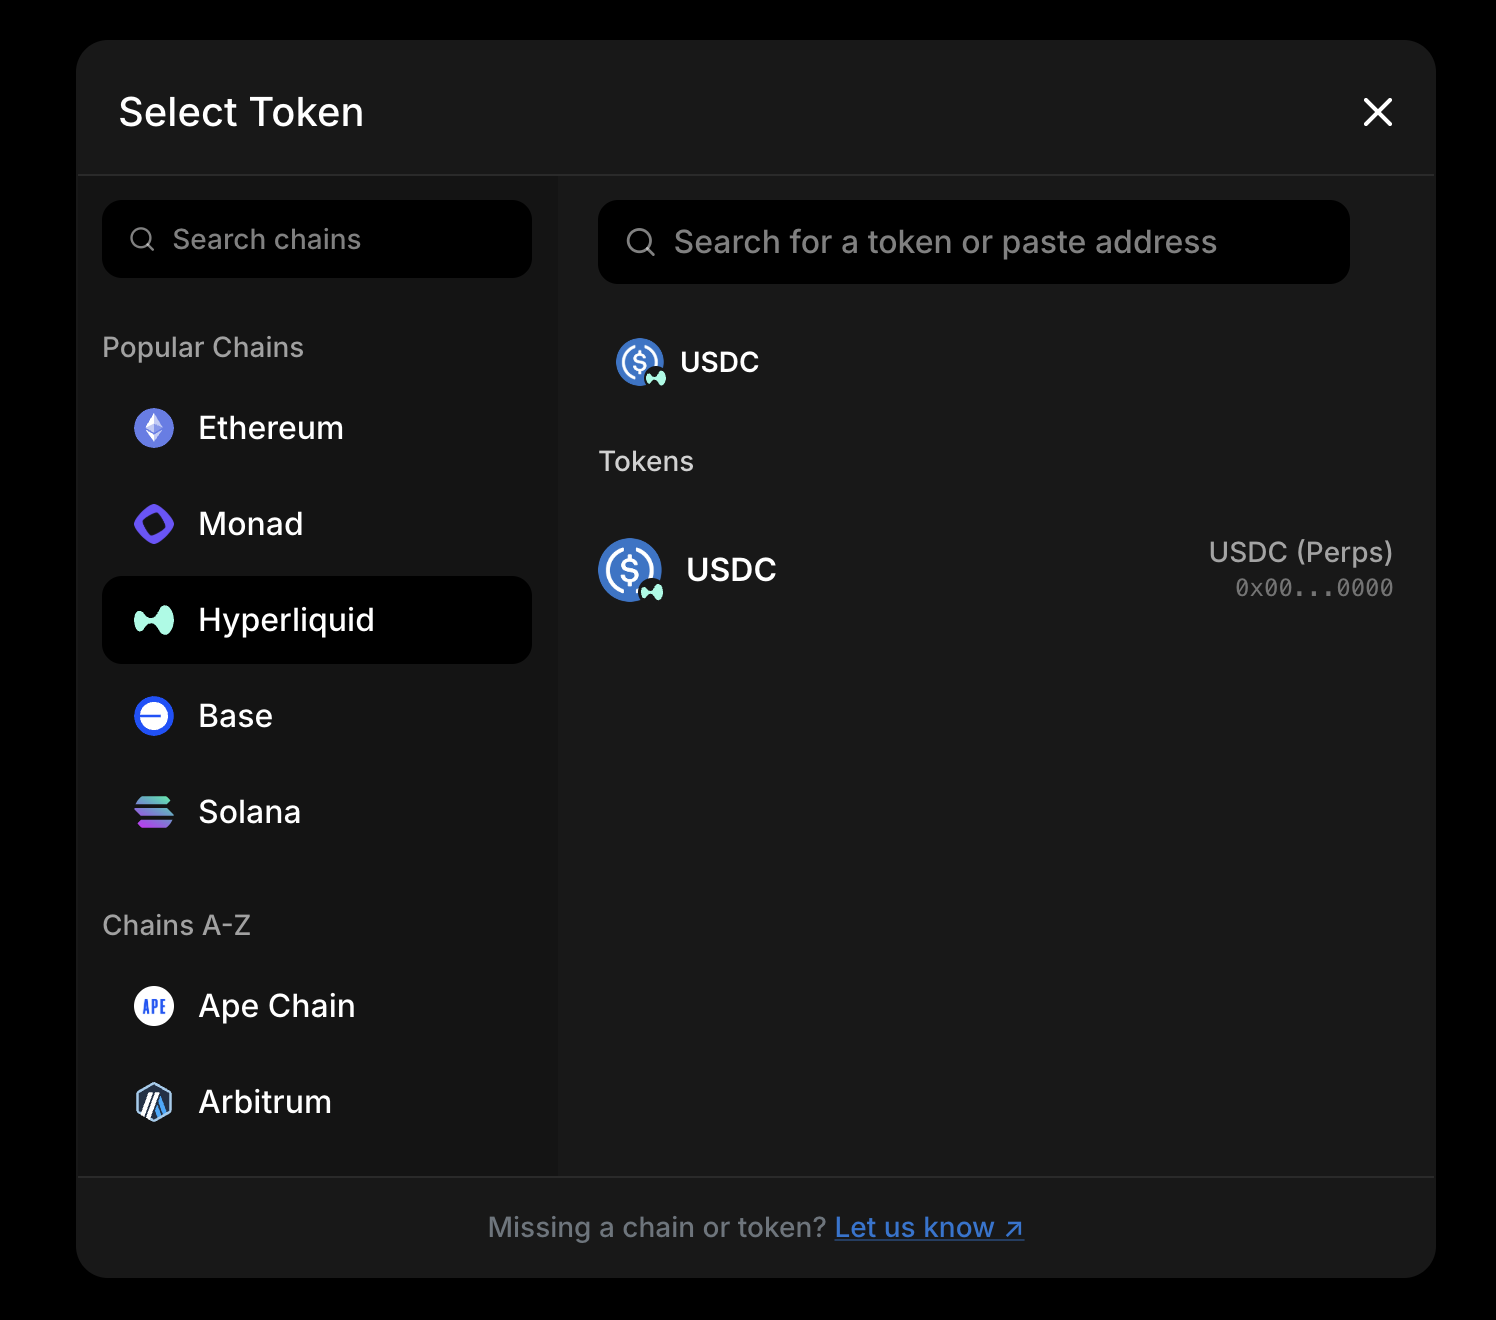
- Choose your desired Chain and Token ZKP2P currently supports most major chains, including Base, Arbitrum, HyperCore, HyperEVM, Mainnet, Plasma, Solana
- Choose the amount of USD you want to send
ZKP2P will automatically calculate how much USDC you'll receive based on liquidity available.
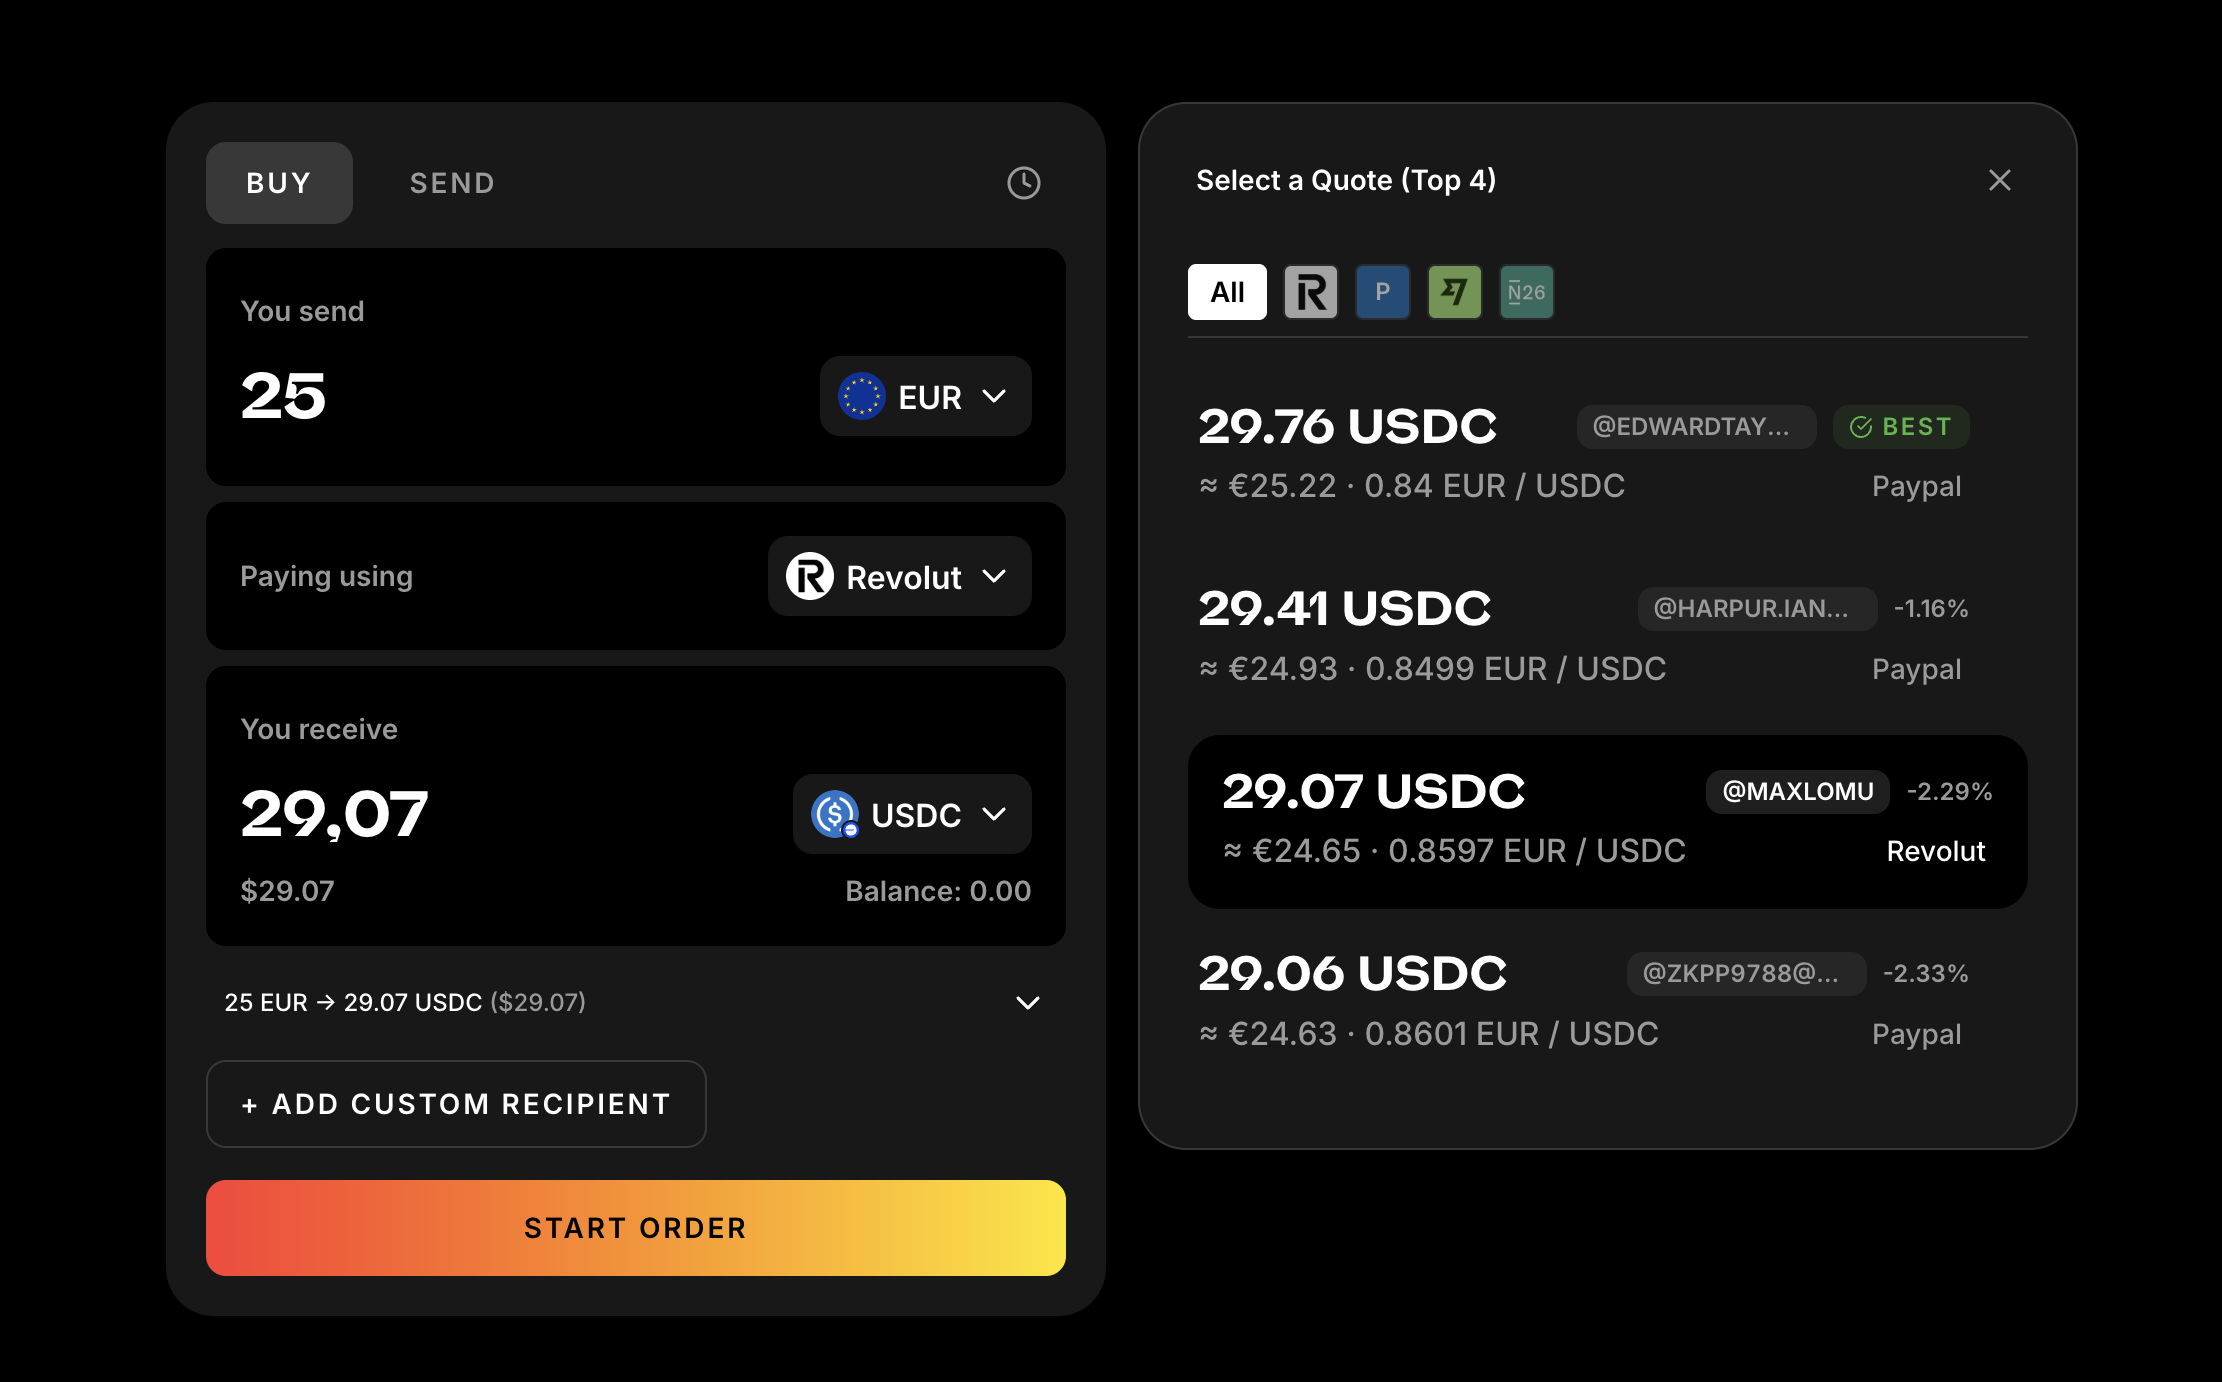
Step 5: Review Order Details
- Check the amount you're sending
- Verify the amount of USDC you'll receive
- Confirm the exchange rate is acceptable
Understanding the Fees
Two fee rows appear above your USDC total. Either row hides when its value is zero.
- Frontend fee — the total platform fee for your order. Hover the info icon to see the breakdown (service fee, referrer fee if applicable, and bridge relay fees).
- Network fee — gas paid to Base to settle the order on-chain.
If you signed in with socials (Google, Email, or X), gas is sponsored and the Network fee shows as 0.
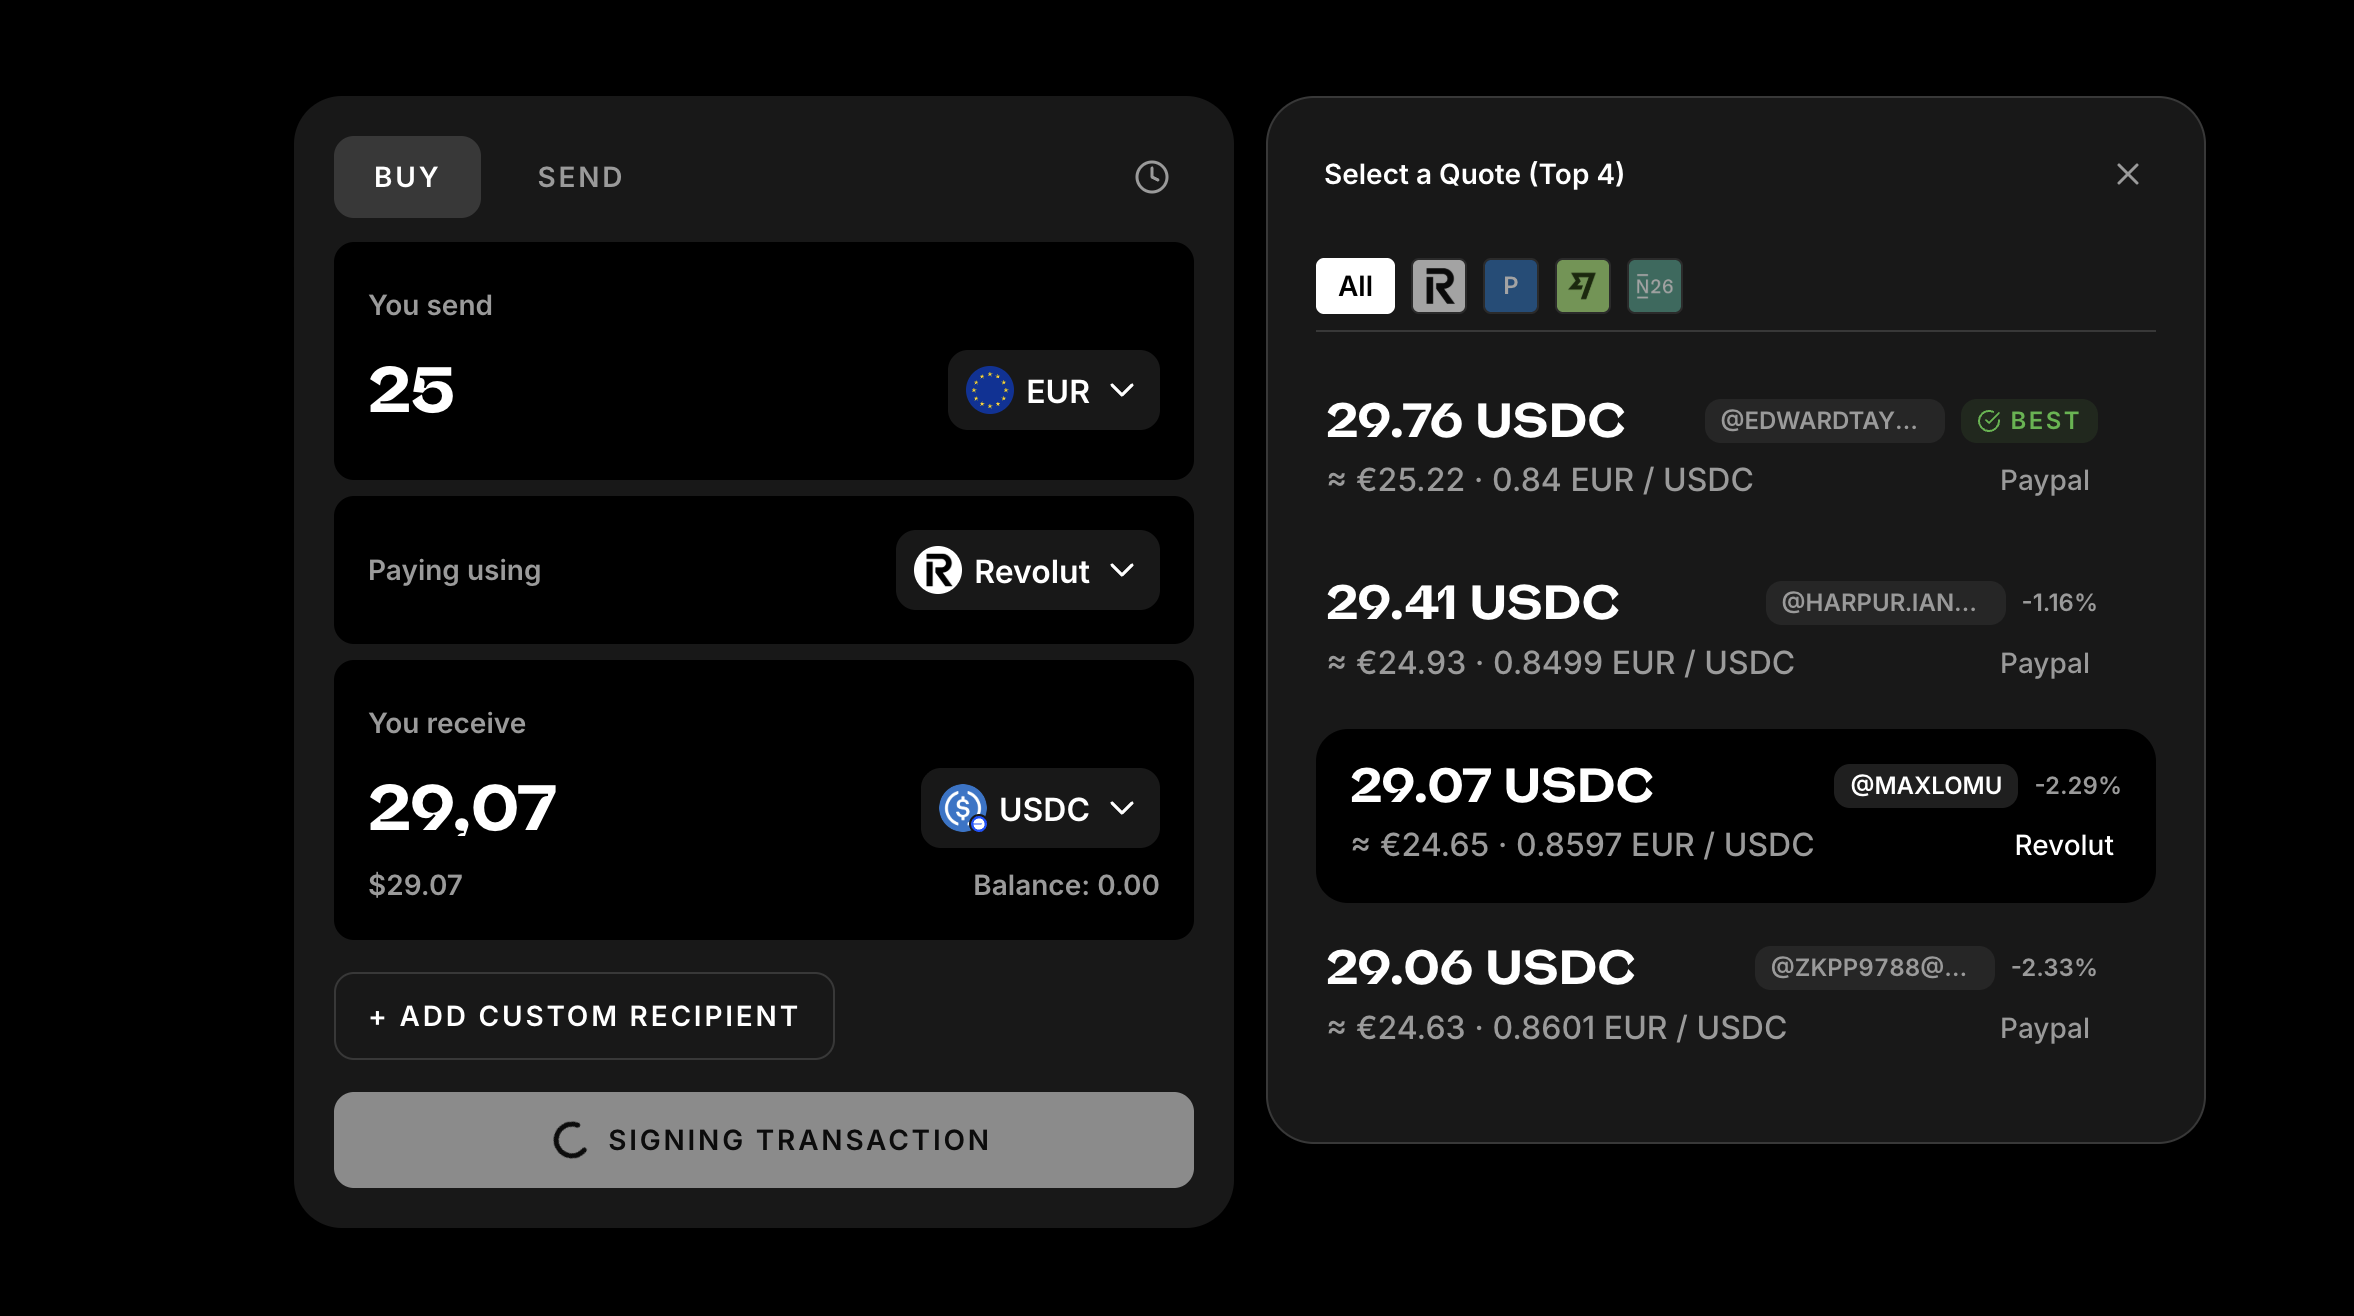
Step 6: Start Your Order
- Click the Start Order button to proceed
- You will be prompted to sign a transaction
- If you logged in with socials, gas is sponsored and you will not have to sign anything.
Step 7: Prepare for Payment Verification
After you send the payment, Peer will guide you through a secure verification step.
- Keep your payment provider available in case you need to log in
- Follow the prompts shown in the order flow
- Stay on the page until verification finishes
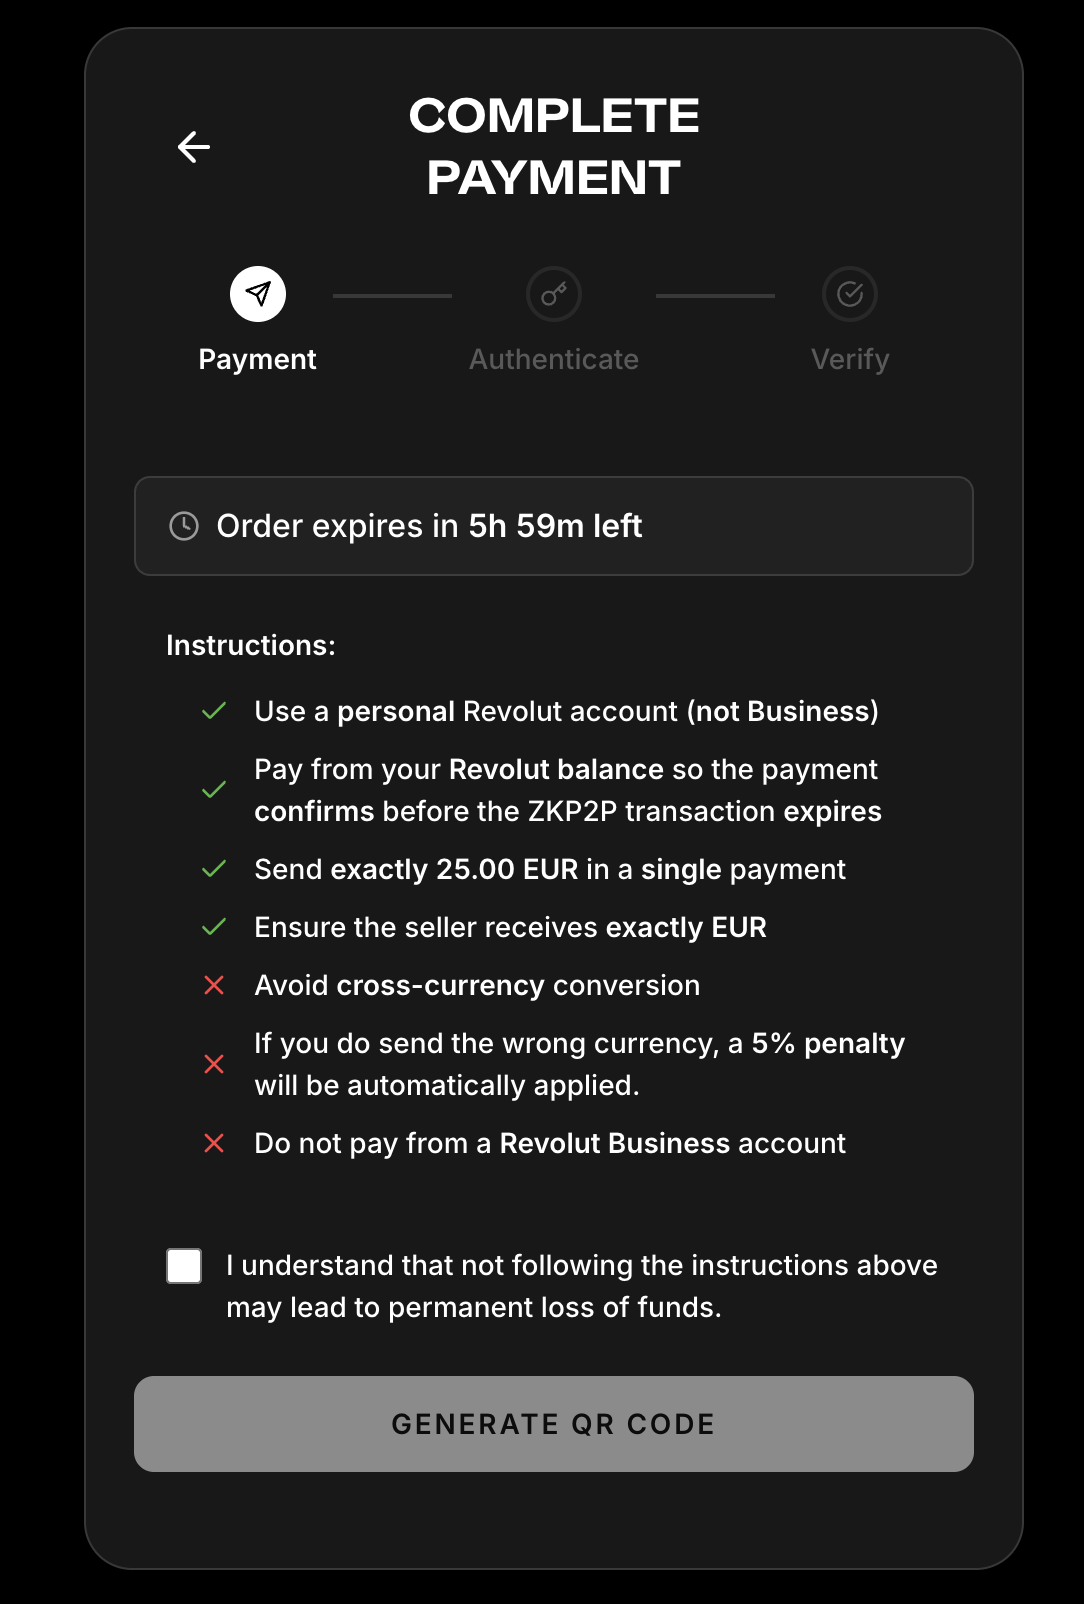
Step 8: Make and Confirm the Payment
- You'll see a QR code or payment instructions
- Send the exact amount to the specified recipient through your payment platform
- Make sure to use the correct currency (e.g., USD, EUR)
- Do not perform cross-currency swaps (e.g., in Revolut), as this can cause verification issues and you may lose your money
- Return to ZKP2P and click I have completed payment
Step 9: Payment Verification Process
- You may be redirected to log in to the payment provider you chose
- Follow the prompts so Peer can securely verify the payment
- After verification, you will be redirected back to ZKP2P
If you paid with PayPal, before logging in you'll see a "PayPal account type" selector. Pick Personal or Business to match the account you used to send the payment. Picking the wrong type will cause verification to fail because Personal and Business PayPal use different login pages and payment data formats. Remember your choice so you can pick the same type if you re-verify.
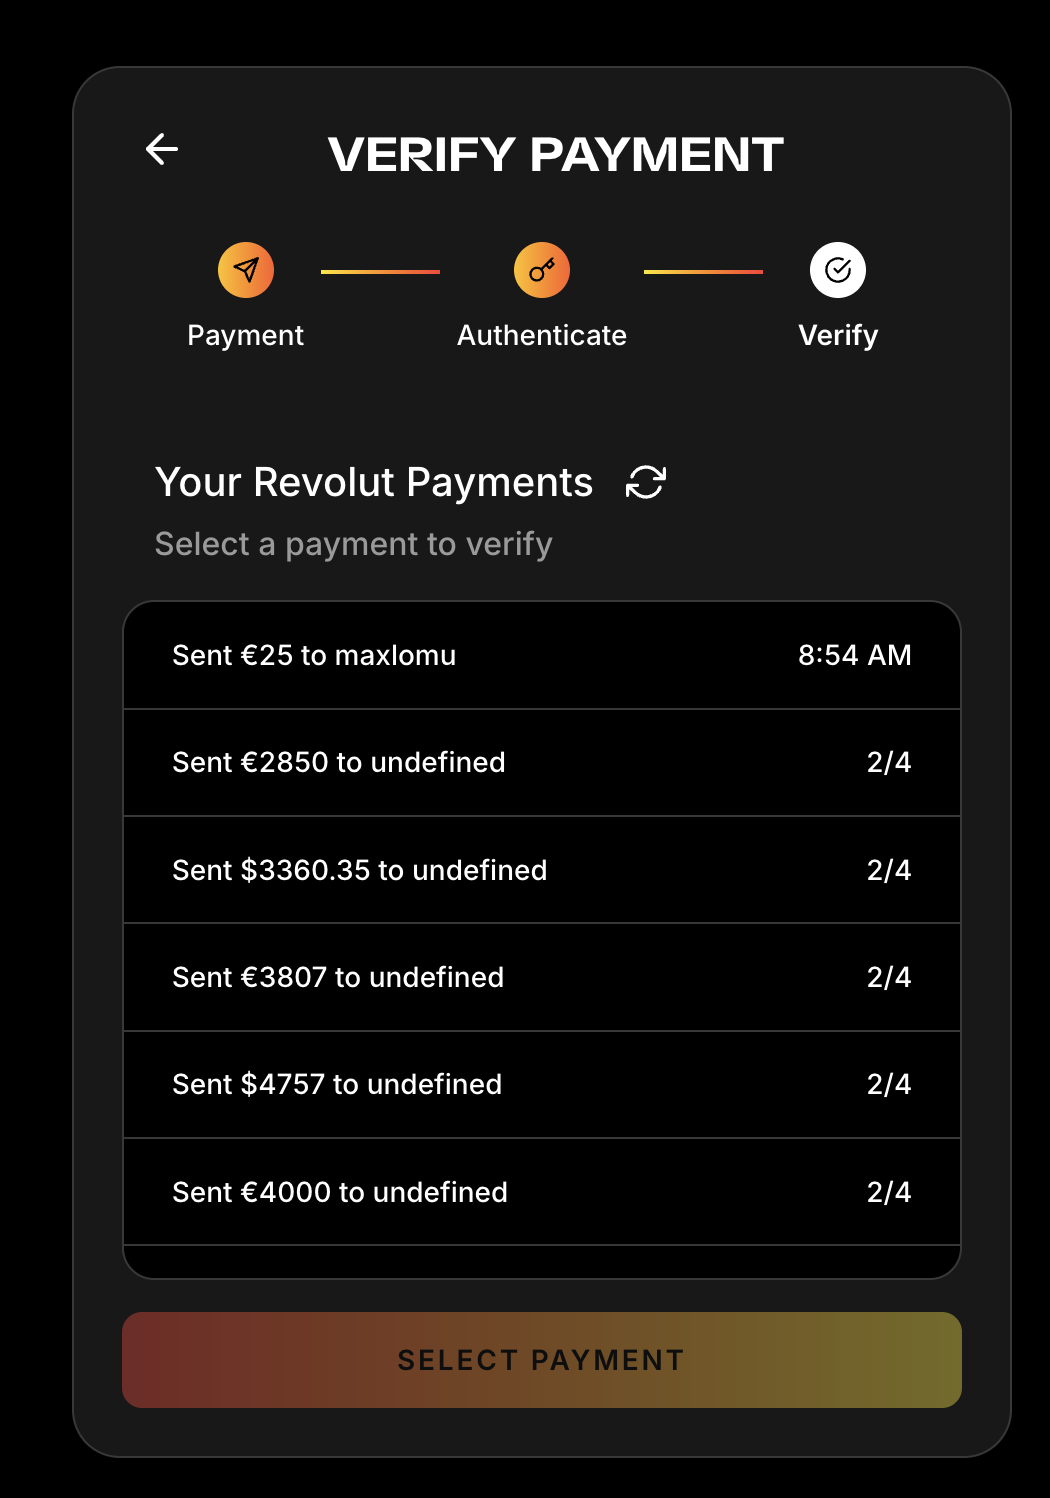
Step 10: Select Your Payment for Verification
If you have multiple payments in your payment platform:
- The system will show your recent payments
- Select the correct payment that matches your ZKP2P order
- Click Verify Payment to continue
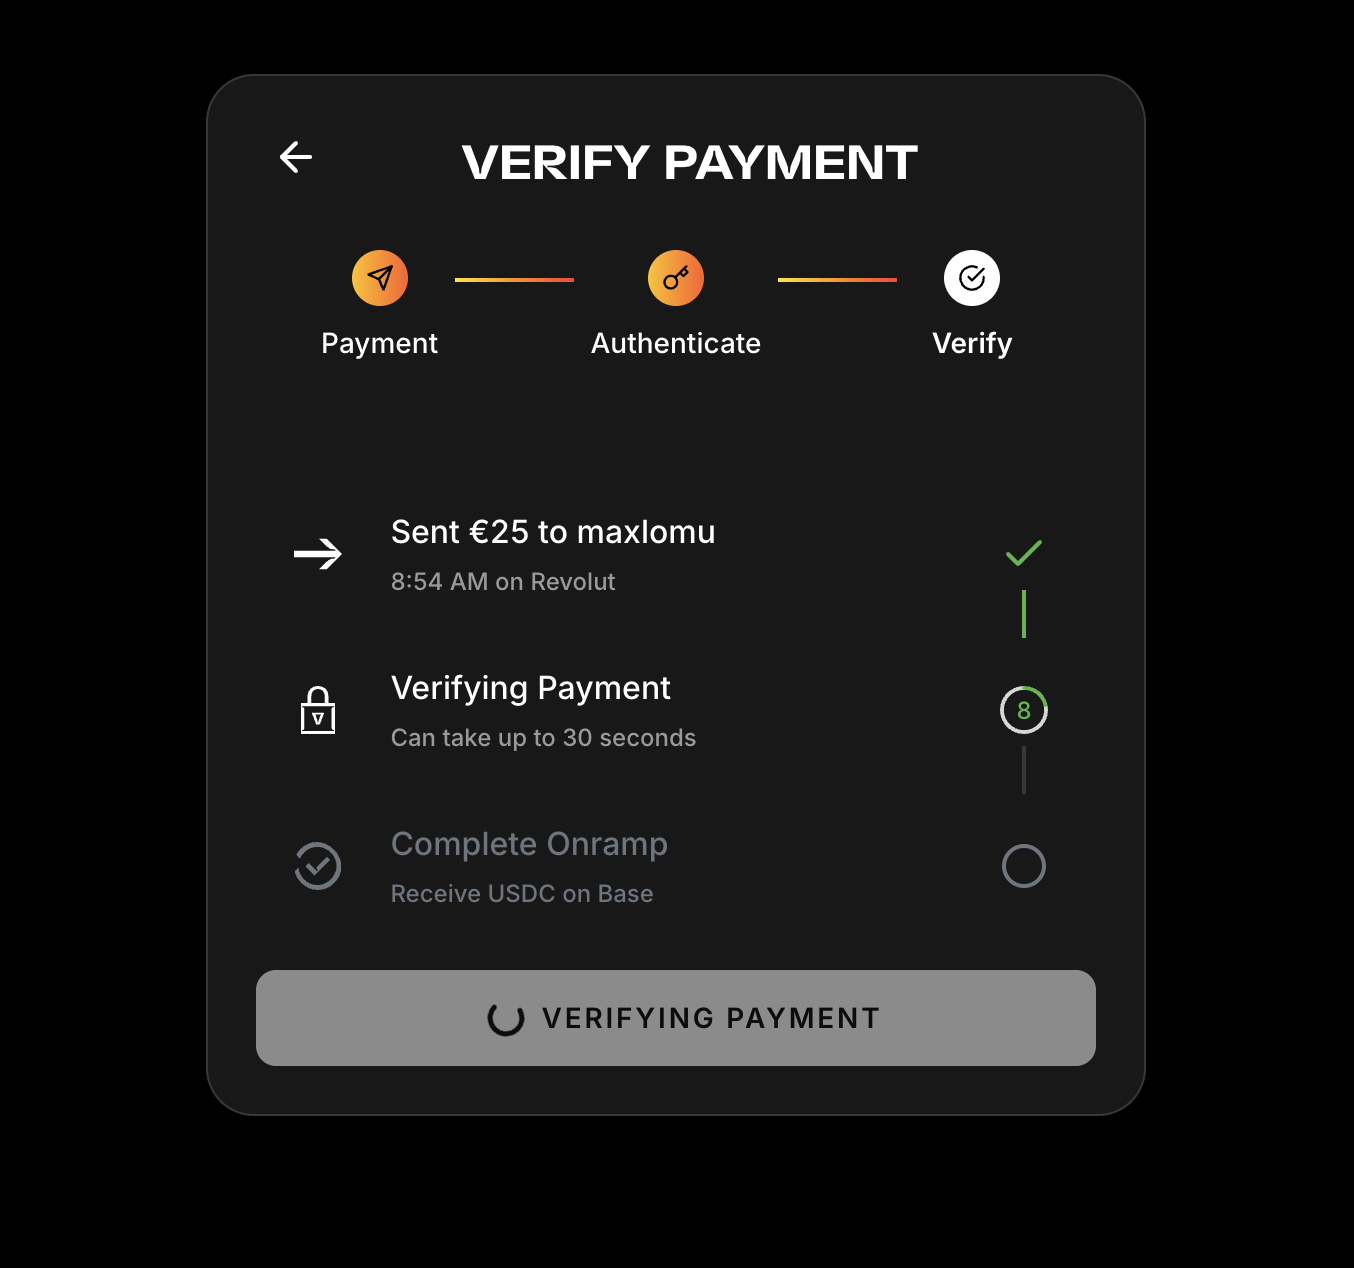
Step 11: Wait for Transaction Verification
- Peer securely checks that your payment matches the order
- Wait for the verification to complete (usually around 30 seconds)
Step 12: Receive Your USDC
- Once verified, you will be able to complete your order
- Click Complete Order and sign the transaction to receive your USDC or cryptocurrency
- Wait for the transaction to finish and use your USDC or crypto on-chain!
